How to Do a Petite Adjustment
Do you need a Petite Adjustment?
Sister Faye patterns are based on a 5’6” individual. If you find that you have a shorter torso, have excess fabric from above your bust apex to your shoulder point, or the bottom of the armscye is hanging much lower than the intended design, you likely need a Petite Adjustment. If you also need a full bust adjustment, do that first before continuing with these steps. You can find information on a FBA here.
Making the Adjustment:
I recommend reading all the way through to the bottom of the page before you begin so you can get a better idea of the order of operations.
Step 1: Try on the garment and pin out the excess above the bust horizontally from the neckline to your armscye. Measure the amount and double it (because it is pinched on the fold). If you have pinched out ½” (1.2cm) then this measurement would be 1” (2.5cm) total.
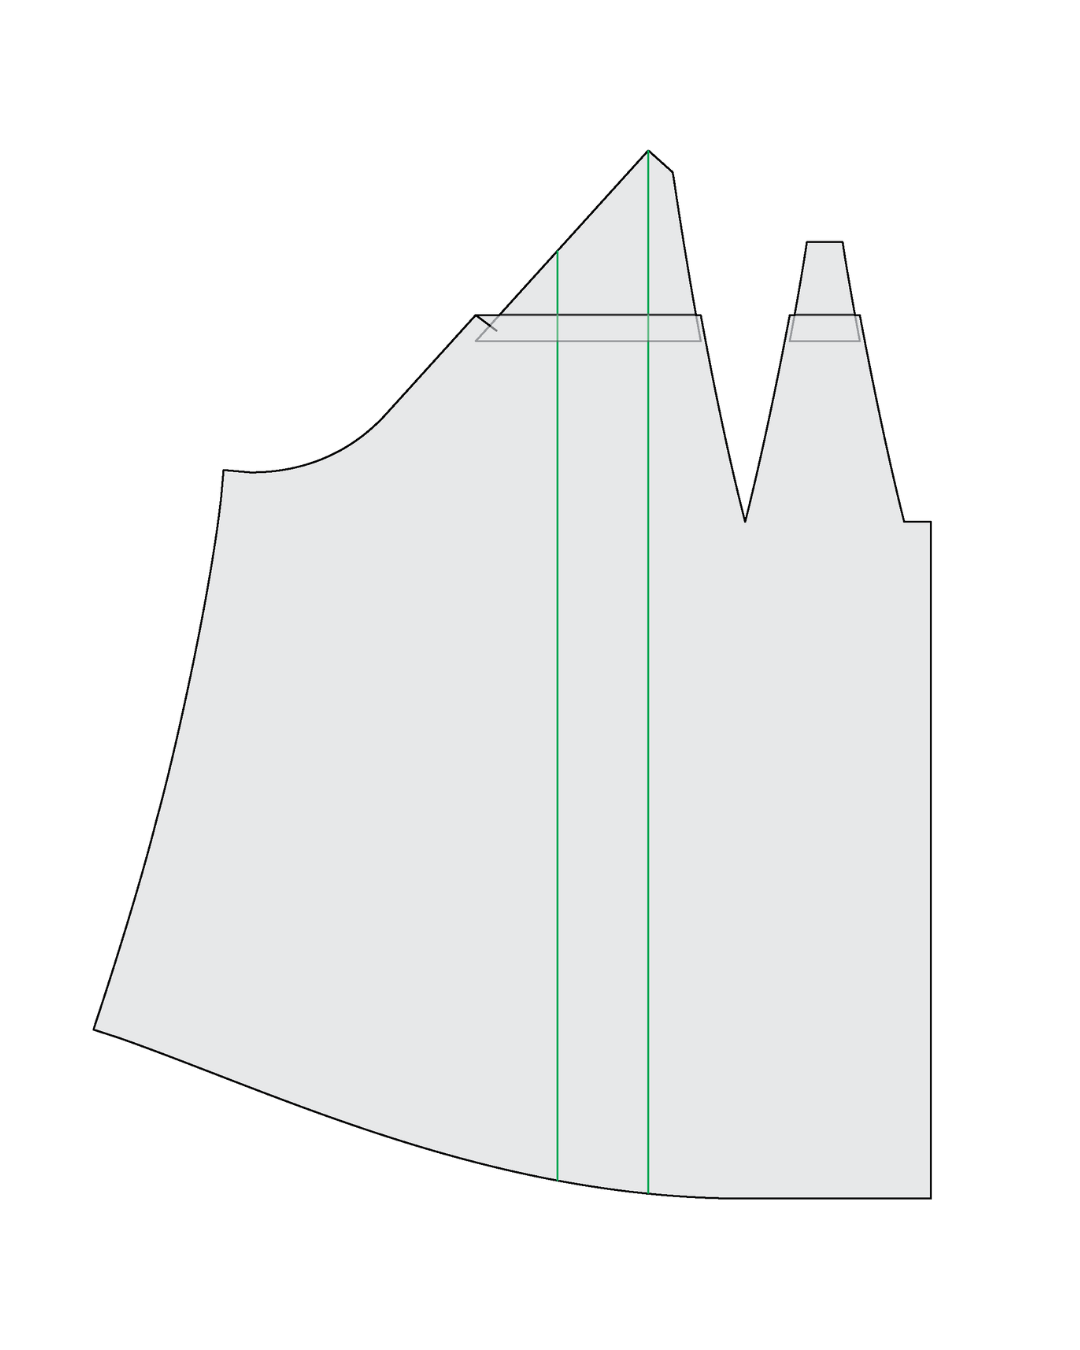
Step 2: On the pattern piece, mark two vertical lines parallel to the grainline. Then mark a horizontal line from the sleeve notch. Mark another horizontal line above it with the amount you calculated above, ie:” 1” (2.5cm).
Step 3: Cut along the lower horizontal line and slide the top pattern piece underneath, overlapping by your excess amount (ie: 1” (2.5cm) for our example). Make sure the vertical lines are aligned on both pieces. Tape the pieces together.
Step 4: Add a piece of paper under your pattern and smooth out the curves.
Step 5: Grab your sleeve pattern piece and draw two vertical lines parallel to the grainline. Draw one horizontal line starting at the front sleeve notch. Draw another horizontal line above it with the amount you calculated above, ie:” 1” (2.5cm).
Step 6: Cut along the lower horizontal line and slide the top pattern piece underneath, overlapping by your excess amount (ie: 1” (2.5cm) for our example). Make sure the vertical lines are aligned on both pieces. Tape the pieces together.
Step 7: Add a piece of paper under your pattern and smooth out the curves.
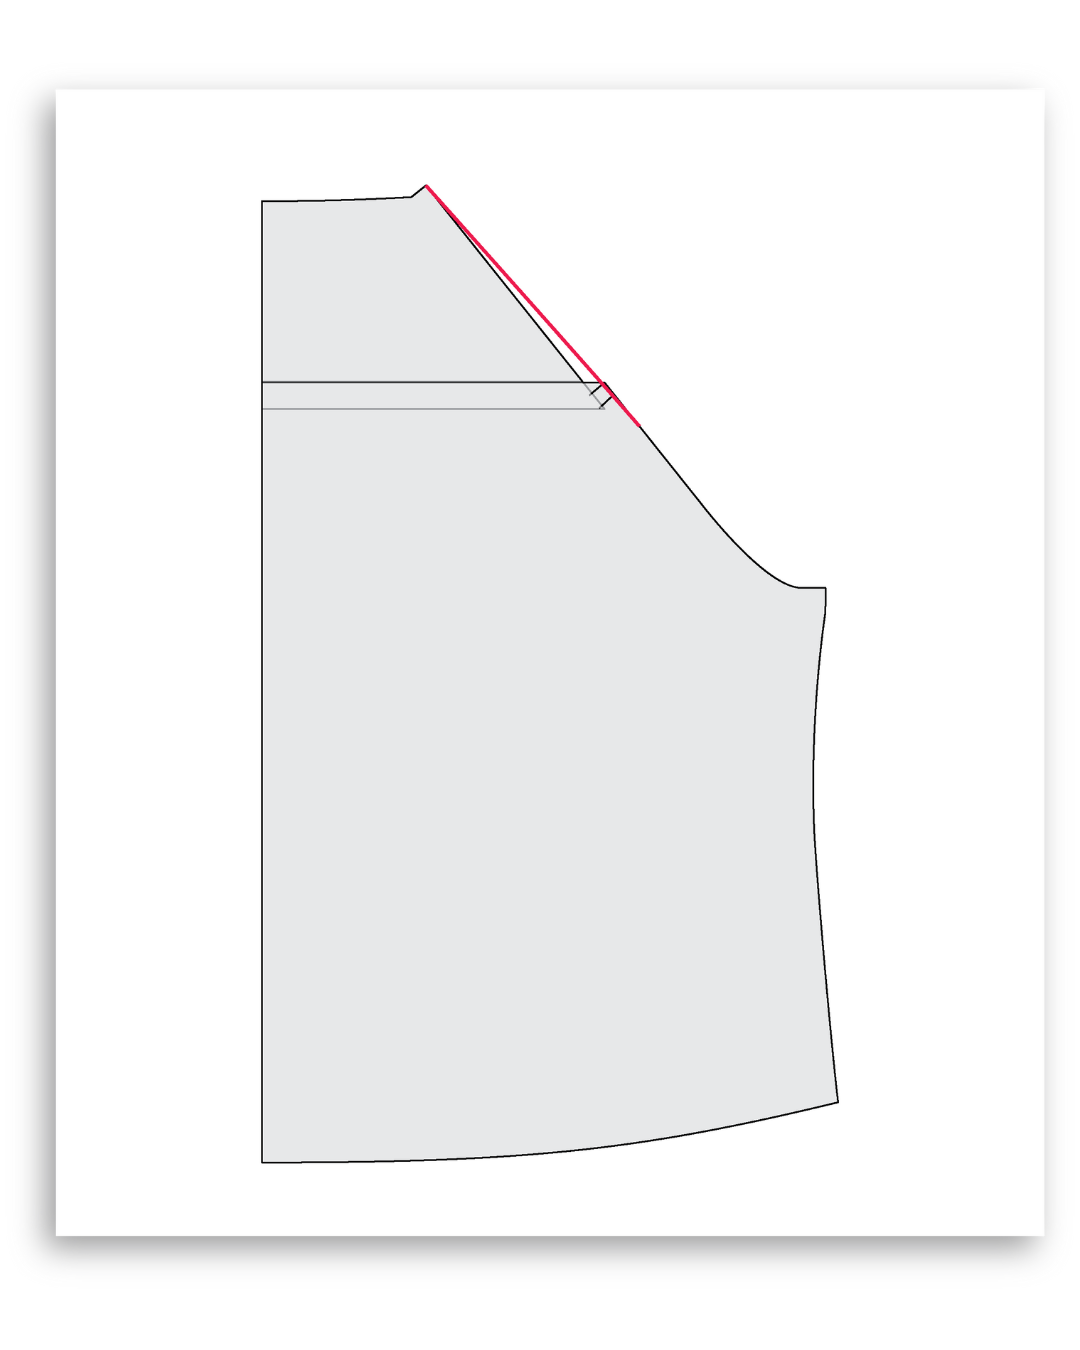
Step 8: Grab your back pattern piece and draw two vertical lines parallel to the grainline. Draw one horizontal line starting at the sleeve notch. Draw another horizontal line above it with the amount you calculated above, ie:” 1” (2.5cm).
Step 9: Cut along the lower horizontal line and slide the top pattern piece underneath, overlapping by your excess amount (ie: 1” (2.5cm) for our example). Make sure the vertical lines are aligned on both pieces. Tape the pieces together.
Step 10: Add a piece of paper under your pattern and smooth out the curves.
Step 11: True the armhole seams by walking the pattern pieces together to make sure the seam length is the same and the notches align. It is okay if the sleeve is a little longer than the bodice (up to 5mm, ¼”), you can ease it in from the neckline to the notch.


